We all know that sad time of year, those weeks where you AREN'T in a foreign country somewhere. The days where you are only dreaming of your next travel destination. Most people call this the off season, or the low season. I like to call this the PLANNING SEASON. I like to shop for items that will be great tools on my next tour. As an EF Group Leader, I spend most of the school year prepping for the next tour (tough life, I know!). As a teacher, traveling with a bus full of students, you can never be over prepared. So, I thought I'd share the top six tools in my carry-on bag!
| 1. Electric Converter and Adapter. When traveling internationally, you cannot forget to pack your converter and adapter. This will ensure that all of your devices are charged and ready for a full day of tour. If you've never traveled outside of the United States, this is one tool you may not know that you need. The electrical systems in other countries use different watt and voltage. If you don't use an adapter, you will not be able to plug your electrical item into the wall. If you don't use a converter, you might just set the place on fire. :) As a group leader, I always bring my converter and adapter to pre-departure meetings, and explain to my travelers just how they work. I encourage them to all buy adapters for their phone and camera chargers, and to purchase a converter if they are planning to use other things, like hair dryers, straighteners, curling irons, etc. You can pick up an international kit that has both a converter (to change the strength of the electricity) and adapters (that change the shape of the plug, so it will fit in the wall), at many stores like Target and Walmart. | 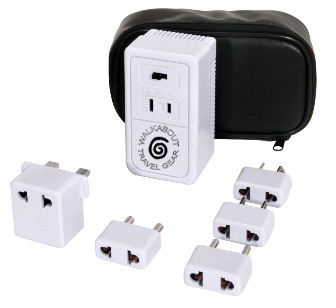 |
| 2. Luggage Scale. Before my group departs on our tour, I use a luggage scale to weigh each checked bag, to make sure that it is not over the airline's weight limit. If a bag is overweight, the traveler will often be charged a fee. After the bag makes the weight requirement, I ask each student to put a large strip of brightly colored duct tape on the side of the bag (see #3). I like for the bags to be marked, because it makes it easier to visually see the bag on the luggage carousel, and while transferring hotels. I throw the luggage scale into my bag, and the use it again the night before we return home. Travelers acquire many souvenirs while on tour, and I want to make sure that the bag is not over weight on the return flight. This allows everyone the time to shift around items before going to the airport and being surprised that the bag is over weight. One other tip: I always require my travelers to be 10 lbs under the airline limit on the outbound flight, so that they have some leeway on the way home. For example, if the airline weight limit is 50 lbs, I ask my travelers to aim for no more than 40 lbs. When they weigh the bag with the scale before departure, they can get a good idea of how much more weight they can add to the bag for the return flight. The scale pictured is the one that I have, and I absolute love it! There are many brands and styles out there, find one that works for you! | 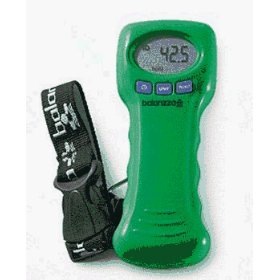 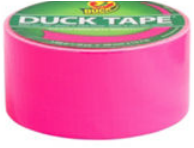 |
| 3. Duct Tape. Duct tape is handy for lots of situations, travel included. I choose a brightly colored roll of duct tape, and have all my travelers place a large strip on either side of their checked bag before we depart. The duct tape makes it easier to see the bags on the luggage carousel, collect them faster, and get the tour started! It also makes it easier to see bags that might not have gotten left behind in the lobby, or anywhere else. Tip: take a sharpie, and have travelers write their last name on the tape, so that there is quick identification of its owner. As I am sure you can imagine, duct tape comes in handy while traveling. I've used it to patch up bags, shoes, etc. At departure, I throw the duct tape in my bag and keep it handy for the duration of the tour. You never know when you will need it! | 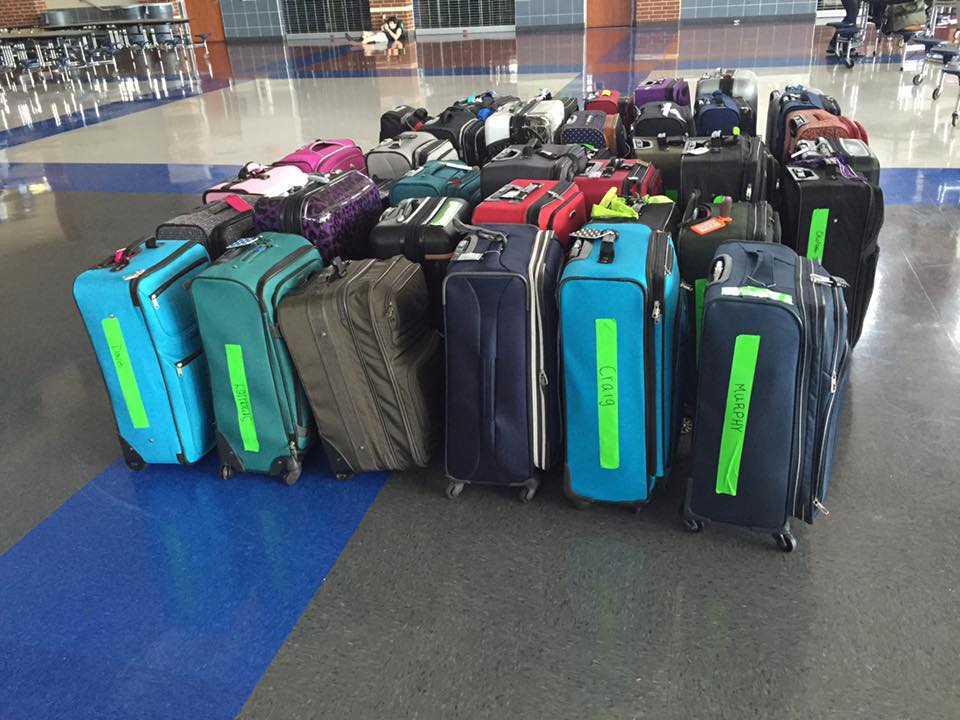 |
| 4. First aid kit. You should never leave home, with a bus full of travelers, without a first aid kit. The number one most used item in my kit: BAND AIDS. I purchase an inexpensive kit at a local store (seriously inexpensive...like $1.00!). It has band aids, ointment, gauze, and an assortment of other things. I always add extra band aids to the kit, and keep it handy in my carry-on bag. All the walking creates lots of blisters on my travelers feet, and the band aids are a necessity. I've use it for other situations such as small scratches and cuts, etc. Tip: Add some basic over-the-counter medications for an upset stomach or headache...but be sure to get parental permission before dispensing any medication to minors. | 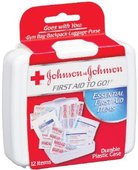  |
| 5. Small Notebook, with all important documents. We live in a digital age, where we can find information in merely seconds. I travel with both my phone and tablet, but like to have an old fashioned back up, because you never know when technology will fail...especially when you travel internationally. I carry a small notebook, and put a copy of all my important documents inside. I shrink down the pages on the copier, and then tape them into my notebook. Some of the information that I take with me: -Flight information -Hotel addresses -Emergency contact list -Passport list (travelers and their passport numbers) -Rooming list -Travelers who have purchased insurance -Several copies of my "traveler list" so that I can use it as a check list on tour if the need arises. I keep the notebook with me at all times, and find myself using it all the time. It is also nice to have some blank pages so I have some scratch paper, and a place to take notes, or write reminders. | 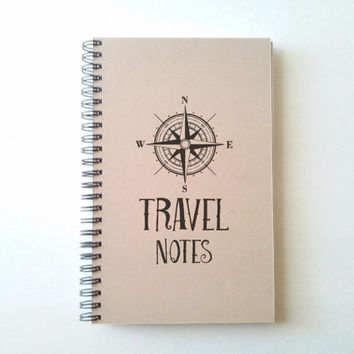 |
| 6. Expo markers. On tour, it is not uncommon to stay in a couple of different hotels in each city that you visit. Tours are fast-paced, and I like to keep my travelers informed with my room number, phone number and the schedule for the next day. I take expo markers with me on tour, and use them to write on the mirror in my travelers rooms when I do room checks each night. Each night, I do a head check, making sure that everyone is in their room and accounted for. As I and my fellow chaperones visit each room, I like to do a quick "check in" with each room about the time for wake-up call, and departure for the next day. So, in each room, I write on the mirror, as I go over the info with the travelers: -Breakfast start time -Departure time -My roomnumber -Important reminders (bring an umbrella, wear athletic shoes, etc.) This helps my travelers be more prepared and on-time each day on tour. I simply ask the last person out to wipe off the mirror each day. If they forget, housekeeping usually takes care of it. | 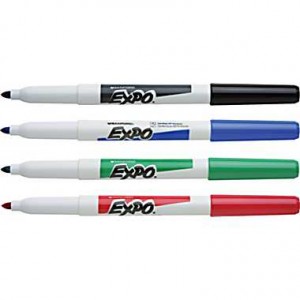 |
These six items don't take up much room in my bag, and have proven to be very helpful on tour. Just a little bit of preparation can go a long way!
What are your must have tools in your Group Leader tool kit? I'd love to hear from you!

 RSS Feed
